

For delivering a Horizon Cloud VDI ( Virtual Desktop ) from Microsoft Azure to end users, we must create at least one assignable desktop image from Microsoft Azure Marketplace.
Microsoft provides a variety of VM templates in the Microsoft Azure Marketplace. Upon import, Horizon Cloud Service joins the VM to the domain, automates the Horizon and DaaS agent installations and performs a bootstrap process, enabling secure pairing of the DaaS agent to the Horizon Cloud Service pod. All of this is automated process.
After the imported VM is configured with the necessary applications, you have to convert the VM to an image , which will run SYSPREP and seals the OS. All of this is run as an automated process by Horizon Cloud Service. Once the image is published, we can use the image to create RDS session host farms or dedicated / floating VDI desktops pool.
Creating the image mainly involves below steps.
Create a Base Virtual Machine (VM)
Pair the Image VM with Horizon Cloud
Customizing the Windows VM
Convert Image VM to a Published Image
Create a Base Virtual Machine (VM)
Log in to Horizon Cloud Service, using your My VMware account ID and password.

Next Login with your Domain Account

Navigate to Imported VMs
In the navigation panel of the Horizon Cloud Service Administration Console, click Inventory.
In the Inventory menu, click Imported VMs.
In the Imported VMs window, click Import, which imports a Windows VM from the Microsoft Azure Marketplace.

Provide Destination Desktop Details
In the Import Desktop Marketplace window under Destination Desktop, provide the following information:
Location : From the drop-down menu, select based on your POD Location
Pod: Select a pod for the desktop.

Scroll down & provide Virtual Machine details.
OS: Select the operating system to use from the Microsoft Azure Marketplace.
Domain: Select the Active Directory domain that you want configured in the base VM.
Enable Public IP Address: Select Yes to configure a public IP or No if you don't want and you can RDP using the Private IP for RDP connection.
Optimize Windows Image: Select Yes to optimize Windows on image import, which improves VM performance and capacity utilization.
Remove Windows Store Apps: Select Yes to remove Windows Store apps, which improves performance & will keep the Standard apps like Calculator, Photos, Music etc..,
Scroll down & provide Admin Credential details.
Username : Enter the administration username for the VM account. This username is used for the local administration account to access the OS of the golden image VM for SysPrep & Customization.
Password : Enter the password for the administrator account
Verify Password : Re-enter the password to verify.
Do you have a Windows Server License : Select Yes, and select the check box to confirm that you have the proper license.
Scroll to the next panel & provide the required for Properties panel.
Name: Enter a unique name for the golden image VM.
Description: You can enter an optional description.

Scroll to the next panel for Advanced Options to reveal the Horizon Agent Features panel, accept the default to install all features in the golden VM, Select the App Volume agent, if you are going to use it for AV Enabled pool or use this for Application Capture base Image
App Volumes Agent : Select to install the App Volumes Agent on the desktop..
Enable Flash MMR : Select to have Flash content sent to the client system and played in a Flash container window using the Flash Player ActiveX version.
3D support in RDSH: Select to support vGPU-powered 3D multi-session hosts.
MMR for Terminal Services: Redirects multimedia content directly to the client computer, which plays the media content, offloading the demand on the RDS desktop and improving performance optimization.
Client Drive Redirection: Allows you to share folders and drives on your local system with remote desktops and applications.
Skype for Business: Provides the ability to use the RDS desktops to make optimized audio and video calls with Skype for Business inside a virtual desktop without negatively affecting the virtual infrastructure and overloading the network.
Webcam Support (Real Time Audio Video RTAV): Select to run Skype, Webex, Google Hangouts, and other online conferencing applications on remote desktops with client local webcam and audio devices.
Smart Card: Lets you redirect smart cards from client to remote sessions for both SSO and in-session leverage.
Thin Print: Allows you to print to any printer configured for your local computer from a remote desktop or application without installing printer drivers on the remote desktop.
Scanner Redirection: Redirects scanning and imaging devices that are connected to the client systems so those devices can be used with the desktop or remote application.
USB Redirection: Enables redirection of USB devices that are connected to your local client system so those devices can be used with the desktop or remote application.
URL Redirection: Collects performance data from monitored software and hardware objects in your Horizon environment and provides predictive analysis and real-time information about problems in your Horizon infrastructure.
Serial Port Redirection: Enables devices connected to serial ports on your local client system so those devices can be used with the remote desktop or application.
Geolocation Redirection: Allows the geolocation information of the client system to be used by Internet Explorer in remote desktops.
Help Desk: Select Yes to install the Help Desk.

Click Import to finish the VM creation process.
Pair the Image VM with Horizon Cloud
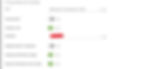
Once the VM is successfully created using the Horizon automated wizard, the Agent Status column will display Not Paired (Import Successful) meaning the resulting VM is not yet paired, even though it has the agent software installed on it.

On the Imported VMs page to reset the agent pairing use the Reset Agent Pairing (VM --> More --> Reset Agent Pairing ) action on the VM to explicitly pair the VM with Horizon Cloud.
This process can take several minutes. During the pairing process, the VM is restarted and its agent status changes from Unknown to Active. You have to refresh the page using the circular arrow icon to see the status changes.

Once the status changes to Active, it indicates that the VM is paired with Horizon Cloud.
Customizing the Windows VM
After the virtual machine (VM) agent status shows as active, then you customize the image VM's guest Windows operating system (OS) with the required applications you want to provide to your end users, as well as configure any OS-level settings such as customized wallpaper, start menu, taskbar, required store apps etc..
RPD the Machine with the Displayed IP
Login with the Local Admin user which was provided during the VM import time
Uninstall the horizon dynamic environment manager ( DEM ) & reinstall with required switches
Install required applications, Make any customizations or configurations, such as adding custom wallpaper, setting default fonts or colors or themes, adjusting the taskbar default settings, and so on
When you finish, sign out of the operating system. Note: Do not shut down the Windows operating system, but instead, use Sign Out.
Note : For Best Practice and better performance, you can download the VMware OSOT and follow the tool's on-screen advice for further.
Convert Image VM to a Published Image
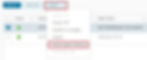
Once all the customization is completed and you logged off from the VM, you can directly publish the image from the Imported VM's tab or you can do the same from the Images Tab. Lets follow the easy method where we can directly publish the image.
Select the VM On the Imported VMs page to publish the images (VM --> More --> Publish to Images ) for assignments to pools.

Provide the Company Name, Admin user name ( Admin name was was provided during the VM import section ) & Password, then Click Publish

The publishing process takes several minutes to complete. The page displays the In Transition status during this process. You can use the refresh icon to see the latest status.

When the image is in Published status, it is considered sealed in Horizon Cloud. Sealed images are those VMs that the system can use in RDSH farms for delivering session-based desktops, VDI desktop assignments.

Now you can use this image for creating the Dedicated, Floating & App capture base image.
Thanks guys following this, I will discuss more on the Horizon Cloud on Azure in my upcoming post, stay tuned ...